Archives October 2026

Cara Membuat Saus Lebih Enak: Memahami Keseimbangan Rasa agar Masakan Tidak Hambar

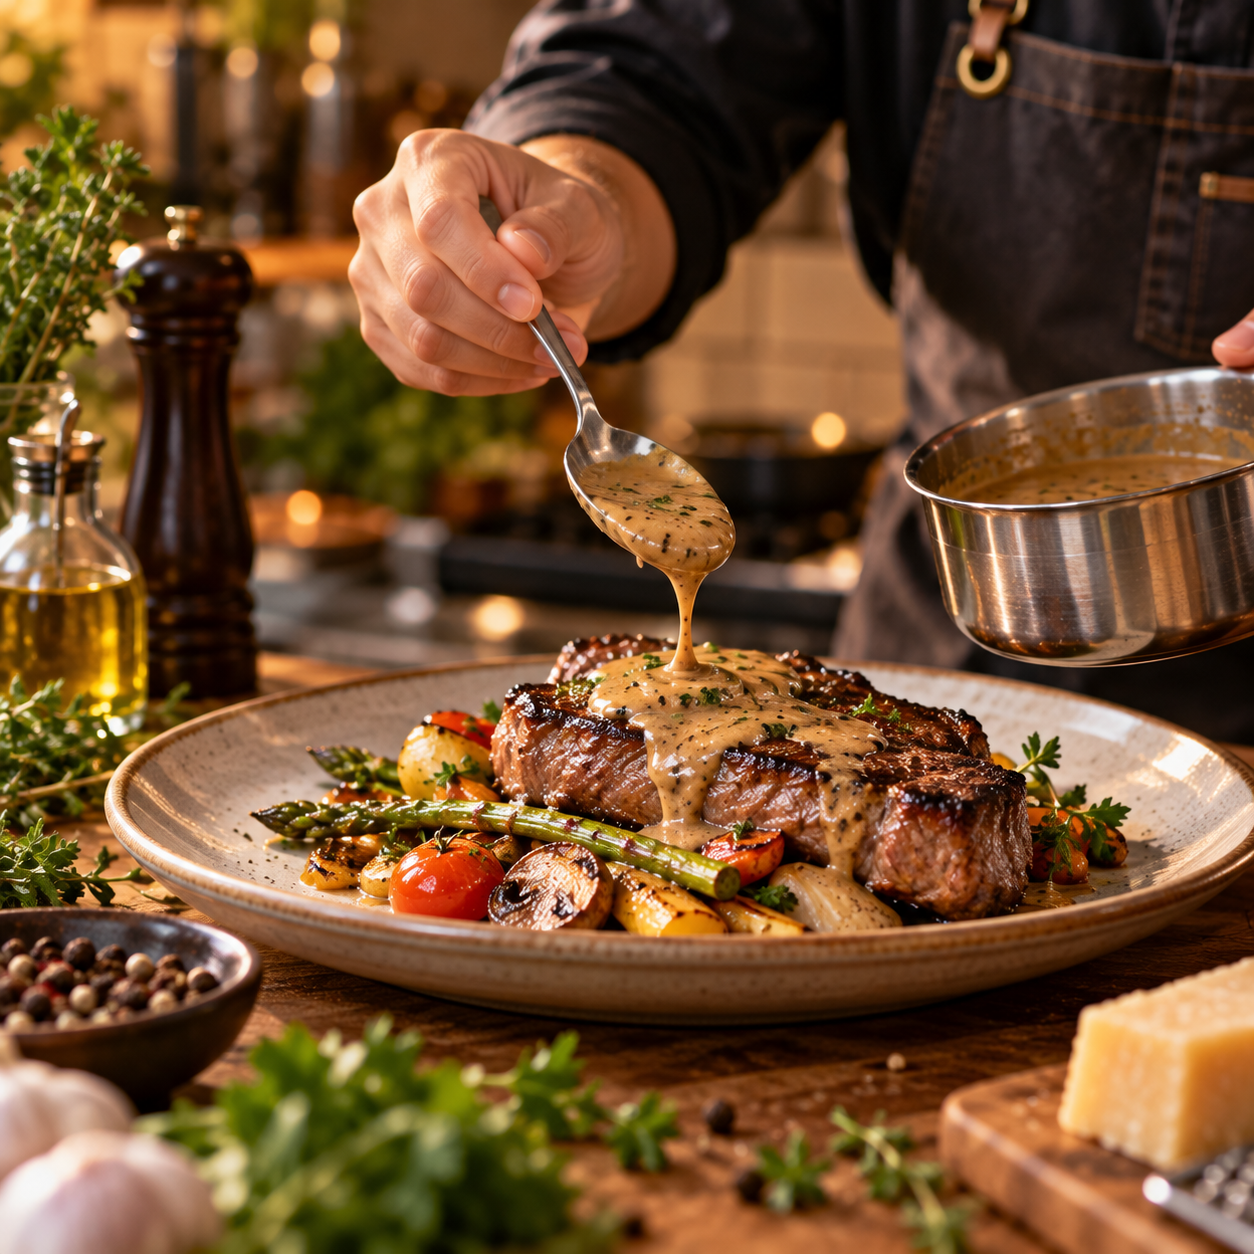
Saus sering menjadi bagian yang menentukan apakah sebuah hidangan terasa biasa saja atau benar-benar berkarakter. Daging panggang sederhana, pasta, kentang, sayuran, hingga sandwich dapat terasa jauh berbeda ketika dipadukan dengan saus yang memiliki rasa seimbang.

Masalahnya, cara membuat saus enak bukan hanya mengikuti jumlah bahan dalam resep. Saus yang berhasil membutuhkan keseimbangan antara rasa asin, manis, asam, gurih, lemak, aroma, dan tekstur. Sedikit perubahan pada salah satu unsur dapat mengubah keseluruhan hasil.

Memahami prinsip dasarnya membuat proses memasak jauh lebih fleksibel. Ketika saus terasa terlalu berat, terlalu asam, atau kurang kuat, Anda dapat mengetahui bagian mana yang perlu diperbaiki tanpa harus langsung membuatnya kembali dari awal.

Mulai dari Fungsi Saus dalam Hidangan

Sebelum memasak, tentukan apa yang ingin dilakukan saus terhadap makanan.

Saus untuk steak memiliki kebutuhan berbeda dari saus salad. Saus pasta berbeda dari dipping sauce untuk makanan goreng.

Ada saus yang berfungsi menambahkan kelembapan.

Ada yang memberikan kontras rasa.

Ada pula yang menjadi komponen utama dan mengikat seluruh bahan dalam hidangan.

Jika makanan utama sudah memiliki rasa kuat, saus tidak selalu harus dibuat kompleks. Sebaliknya, bahan yang relatif netral dapat memperoleh karakter lebih banyak dari saus.

Memahami fungsi tersebut membantu menentukan intensitas rasa yang tepat.

Keseimbangan Rasa Lebih Penting daripada Banyak Bahan

Saus yang lezat tidak harus memiliki daftar bahan panjang.

Beberapa saus sederhana hanya membutuhkan beberapa komponen yang bekerja dengan baik bersama-sama.

Hal terpenting adalah keseimbangan rasa dalam masakan.

Jika terlalu asin, karakter bahan lain akan tertutup.

Jika terlalu manis, saus dapat terasa berat.

Jika terlalu asam, rasa menjadi tajam.

Jika terlalu banyak lemak tanpa unsur penyeimbang, saus dapat terasa enek.

Tujuannya bukan membuat semua rasa sama kuat. Salah satu rasa tetap dapat menjadi karakter utama, tetapi unsur lainnya membantu membuatnya terasa lebih lengkap.

Garam Bukan Sekadar Membuat Saus Asin

Garam berfungsi memperkuat persepsi berbagai rasa.

Saus yang terasa datar terkadang sebenarnya tidak membutuhkan lebih banyak rempah. Ia hanya membutuhkan sedikit seasoning.

Namun, tambahkan garam secara bertahap.

Hal ini terutama penting jika saus sudah menggunakan bahan seperti soy sauce, keju, stock, cured meat, atau bahan lain yang mengandung garam.

Setelah saus mengalami reduksi, konsentrasi garam juga dapat meningkat.

Karena itu, koreksi seasoning menjelang akhir sering lebih aman daripada memberikan terlalu banyak garam sejak awal.

Gunakan Rasa Asam untuk Membuat Saus Lebih Segar

Acidity merupakan salah satu alat paling berguna dalam memasak.

Lemon, lime, berbagai jenis vinegar, wine, tomat, dan bahan fermentasi dapat memberikan unsur asam.

Sedikit acidity dapat membuat saus yang berat terasa lebih hidup.

Bayangkan saus berbasis butter atau cream.

Tanpa unsur penyeimbang, rasa lemak dapat mendominasi.

Sedikit lemon atau komponen asam lainnya dapat memberikan kontras sehingga saus terasa lebih ringan di mulut.

Namun, acidity sebaiknya ditambahkan sedikit demi sedikit.

Terlalu banyak dapat membuat seluruh saus terasa tajam.

Rasa Manis Tidak Selalu Berasal dari Gula

Ketika saus terlalu asam atau pahit, sedikit rasa manis dapat membantu menciptakan keseimbangan.

Namun, gula bukan satu-satunya pilihan.

Madu, buah, caramelized onion, wortel, atau bahan alami lainnya juga dapat memberikan sweetness.

Dalam saus tertentu, rasa manis bahkan muncul dari proses memasak.

Bawang yang dimasak perlahan akan mengalami perubahan rasa dan menjadi lebih manis.

Tomat yang dimasak cukup lama juga dapat menghasilkan karakter berbeda dibanding tomat mentah.

Gunakan sweetness untuk menyeimbangkan, bukan menutupi seluruh rasa.

Lemak Membawa Rasa dan Tekstur

Butter, cream, olive oil, santan, dan berbagai sumber lemak dapat memberikan body pada saus.

Lemak juga membantu membawa aroma dari berbagai bahan.

Itulah sebabnya saus dengan sedikit butter di akhir dapat terasa lebih kaya meskipun jumlahnya tidak terlalu banyak.

Namun, terlalu banyak lemak dapat membuat saus terasa berat.

Gunakan acidity, herbs, atau elemen lain sebagai penyeimbang.

Dalam teknik membuat saus, memahami kapan menambahkan lemak juga penting karena beberapa jenis saus membutuhkan temperatur tertentu agar tetap stabil.

Umami Membuat Saus Terasa Lebih Dalam

Umami sering digambarkan sebagai rasa gurih yang memberikan kedalaman.

Bahan seperti mushroom, parmesan, tomato paste, soy sauce, anchovy, stock, dan beberapa produk fermentasi dapat memberikan unsur umami.

Tidak semua saus membutuhkan bahan tersebut.

Namun, ketika saus terasa sudah asin, asam, dan cukup aromatik tetapi masih seperti “kurang sesuatu”, unsur umami mungkin dapat membantu.

Gunakan dengan hati-hati.

Bahan yang kaya umami sering juga mengandung cukup banyak garam sehingga seasoning perlu disesuaikan.

Aromatic Menjadi Fondasi Banyak Saus

Onion, shallot, garlic, celery, carrot, ginger, dan berbagai bahan aromatik sering menjadi dasar saus.

Cara memasaknya memengaruhi karakter akhir.

Garlic yang dimasak sebentar akan memiliki karakter berbeda dari garlic yang dimasak perlahan.

Bawang yang hanya dilunakkan memberikan rasa berbeda dibanding bawang yang mengalami caramelization.

Temperatur juga penting.

Panas terlalu tinggi dapat membuat garlic cepat terbakar dan menghasilkan rasa pahit.

Karena itu, jangan hanya memperhatikan bahan yang digunakan. Perhatikan juga bagaimana bahan tersebut diperlakukan.

Gunakan Herbs dan Spices dengan Tujuan

Herbs dan spices dapat mengubah arah sebuah saus secara signifikan.

Black pepper memberikan karakter berbeda dari chili.

Rosemary berbeda dari basil.

Thyme berbeda dari coriander.

Tidak perlu memasukkan banyak jenis sekaligus.

Terlalu banyak aroma dapat membuat saus kehilangan identitas.

Pilih beberapa yang sesuai dengan bahan utama.

Fresh herbs juga sering lebih baik ditambahkan mendekati akhir jika ingin mempertahankan aroma segarnya, sedangkan herbs tertentu dapat dimasak lebih lama untuk memberikan karakter yang lebih dalam.

Stock Dapat Menjadi Fondasi yang Kuat

Stock sering digunakan sebagai dasar berbagai saus karena memberikan body dan rasa gurih.

Chicken stock, beef stock, vegetable stock, atau jenis lainnya dapat dipilih berdasarkan hidangan.

Namun, kualitas dan konsentrasi stock perlu diperhatikan.

Jika menggunakan stock yang sudah cukup asin lalu direduksi dalam waktu lama, hasil akhirnya dapat menjadi terlalu asin.

Karena itu, lakukan seasoning secara bertahap.

Stock sebaiknya menjadi fondasi yang mendukung bahan lain, bukan menutupi semuanya.

Reduction Membuat Rasa Lebih Terkonsentrasi

Reduction berarti mengurangi kandungan air melalui pemanasan sehingga rasa menjadi lebih terkonsentrasi.

Teknik ini banyak digunakan untuk membuat saus dengan karakter lebih intens.

Namun, semakin lama cairan direduksi, semakin kuat pula rasa garam, gula, acidity, dan komponen lainnya.

Jangan melakukan seasoning terlalu agresif sebelum reduction selesai.

Perhatikan juga tekstur.

Saus yang terlihat sedikit encer ketika panas dapat menjadi lebih kental setelah temperatur turun.

Menghentikan proses pada waktu yang tepat membutuhkan sedikit pengalaman.

Pelajari Cara Mengentalkan Saus

Ada beberapa metode untuk membuat saus lebih kental.

Reduction merupakan salah satunya.

Metode lain menggunakan roux, cornstarch slurry, cream, puree sayuran, egg yolk, atau emulsification tergantung jenis saus.

Setiap metode memberikan tekstur berbeda.

Roux memberikan body pada saus seperti béchamel.

Cornstarch dapat menghasilkan tekstur yang berbeda dan sering digunakan pada berbagai saus Asia.

Puree sayuran dapat memberikan kekentalan sekaligus rasa.

Jangan menggunakan thickener hanya karena saus terlihat encer tanpa memahami karakter yang ingin dicapai.

Jangan Langsung Menambahkan Banyak Tepung

Ketika saus terlalu cair, menambahkan tepung secara langsung sering menghasilkan gumpalan.

Jika menggunakan roux, tepung biasanya dimasak bersama lemak terlebih dahulu.

Jika menggunakan cornstarch, campurkan dengan cairan dingin sebelum dimasukkan ke saus panas.

Tambahkan sedikit demi sedikit.

Berikan waktu agar thickener bekerja sebelum menambahkan lebih banyak.

Saus yang terlalu kental biasanya lebih sulit diperbaiki daripada saus yang masih sedikit encer.

Emulsi Membuat Dua Komponen Berbeda Menyatu

Beberapa saus bergantung pada emulsification.

Secara sederhana, emulsi membantu komponen yang biasanya sulit bercampur—seperti minyak dan air—menjadi campuran yang lebih stabil.

Vinaigrette merupakan contoh sederhana.

Mayonnaise adalah contoh lain dengan struktur yang lebih stabil.

Butter sauce juga dapat bergantung pada teknik serupa.

Temperatur, kecepatan pencampuran, dan rasio bahan dapat memengaruhi keberhasilan.

Jika emulsi pecah, saus dapat terlihat berminyak karena lemak terpisah dari cairan.

Temperatur Sangat Memengaruhi Saus

Tidak semua saus dapat diperlakukan dengan panas tinggi.

Saus berbasis cream dapat berubah jika dipanaskan terlalu agresif.

Butter emulsion dapat pecah.

Saus dengan telur membutuhkan kontrol temperatur agar telur tidak berubah menjadi scramble.

Sebaliknya, beberapa saus membutuhkan panas cukup untuk melakukan reduction atau mengembangkan rasa.

Karena itu, kontrol api merupakan bagian penting dari cara membuat saus enak.

Jangan selalu menggunakan api besar dengan tujuan mempercepat proses.

Memasak sedikit lebih perlahan sering memberikan kontrol lebih baik.

Gunakan Fond dari Wajan

Setelah memasak daging, terkadang terdapat bagian kecokelatan yang menempel di dasar wajan.

Bagian tersebut dikenal sebagai fond dan dapat mengandung banyak rasa.

Dengan menambahkan cairan yang sesuai, bagian tersebut dapat dilepaskan melalui proses deglazing.

Cairannya dapat berupa stock atau bahan lain yang sesuai dengan resep.

Setelah itu, cairan dapat direduksi dan dikembangkan menjadi pan sauce.

Teknik ini memanfaatkan rasa yang sudah terbentuk selama proses memasak sehingga tidak terbuang.

Cicipi Saus Selama Memasak

Salah satu kebiasaan terpenting adalah mencicipi makanan.

Jangan menunggu sampai saus sudah berada di piring.

Cicipi pada beberapa tahap.

Perhatikan bagaimana rasa berubah setelah reduction, penambahan seasoning, atau bahan baru.

Tanyakan pada diri sendiri:

Apakah terlalu asin?

Apakah terasa datar?

Apakah membutuhkan acidity?

Apakah terlalu berat?

Apakah aromanya sudah cukup?

Mencicipi secara bertahap membuat koreksi jauh lebih mudah.

Cara Memperbaiki Saus yang Terlalu Asin

Saus yang terlalu asin tidak selalu dapat diperbaiki dengan menambahkan gula.

Hal tersebut hanya menciptakan rasa manis dan asin sekaligus.

Jika memungkinkan, tingkatkan volume saus menggunakan bahan dasar yang tidak asin.

Pada saus tertentu, menambahkan cairan, cream, tomato base, atau komponen lain dapat membantu menurunkan konsentrasi garam.

Metode terbaik bergantung pada jenis saus.

Karena itu, pencegahan tetap menjadi solusi terbaik: tambahkan garam secara bertahap dan ingat bahwa reduction akan mengonsentrasikan rasa.

Cara Mengatasi Saus yang Terlalu Asam

Jika acidity terlalu dominan, pertama tentukan seberapa besar masalahnya.

Untuk ketidakseimbangan kecil, sedikit sweetness atau fat dapat membantu.

Pada tomato sauce, misalnya, waktu memasak tambahan terkadang membantu mengembangkan karakter rasa yang lebih seimbang.

Namun, jangan otomatis memasukkan banyak gula.

Tujuannya bukan membuat saus manis, tetapi mengurangi ketajaman yang berlebihan.

Cicipi setelah setiap perubahan.

Cara Memperbaiki Saus yang Terlalu Kental

Jika saus terlalu kental, tambahkan cairan yang sesuai sedikit demi sedikit.

Pilihan cairan bergantung pada saus.

Stock, air, milk, cream, atau cairan lain mungkin digunakan.

Jangan menuangkan banyak sekaligus.

Tambahkan sedikit, aduk, kemudian periksa konsistensinya.

Ingat bahwa beberapa saus kembali mengental jika dimasak setelah penambahan cairan.

Cara Mengatasi Saus yang Terlalu Encer

Jika saus masih terlalu cair, reduction mungkin menjadi pilihan paling sederhana.

Namun, pastikan rasa belum terlalu terkonsentrasi.

Jika saus sudah cukup asin, reduction lebih lanjut dapat memperburuknya.

Dalam situasi tersebut, thickener yang sesuai mungkin lebih tepat.

Pilih metode berdasarkan karakter saus daripada menggunakan satu solusi untuk semuanya.

Tekstur Harus Sesuai dengan Makanan

Saus tidak selalu harus sangat kental.

Untuk pasta, saus sebaiknya dapat melapisi permukaan tanpa menjadi terlalu berat.

Dipping sauce mungkin membutuhkan konsistensi berbeda.

Pan sauce untuk daging dapat dibuat cukup ringan tetapi tetap mampu menempel pada makanan.

Salad dressing biasanya perlu cukup cair agar dapat tersebar.

Pikirkan bagaimana saus akan digunakan sebelum menentukan konsistensi akhirnya.

Pasta Water Dapat Membantu Saus Pasta

Air rebusan pasta mengandung pati yang dapat membantu saus dan pasta menyatu.

Daripada langsung membuang seluruh air, simpan sedikit sebelum pasta ditiriskan.

Tambahkan seperlunya ketika pasta dicampurkan dengan saus.

Teknik ini dapat membantu mengatur konsistensi sekaligus membuat saus melapisi pasta lebih baik.

Namun, air pasta juga mengandung garam jika air rebusan diberi seasoning.

Perhatikan hal tersebut sebelum menambahkan garam tambahan pada saus.

Biarkan Saus dan Bahan Utama Bekerja Bersama

Kesalahan lain adalah membuat saus yang sangat kuat sehingga rasa bahan utama hilang.

Saus seharusnya mendukung hidangan.

Untuk ikan dengan rasa lembut, saus yang terlalu berat dapat mendominasi.

Daging dengan karakter kuat dapat menerima saus yang lebih intens.

Sayuran panggang mungkin membutuhkan acidity atau herbs untuk memberikan kontras.

Keseimbangan tidak hanya terjadi di dalam saus, tetapi juga antara saus dan makanan yang disajikan.

Presentasi Tidak Membutuhkan Terlalu Banyak Saus

Lebih banyak saus tidak selalu lebih baik.

Menuangkan saus dalam jumlah berlebihan dapat membuat tekstur makanan hilang.

Gunakan jumlah yang cukup untuk memberikan rasa.

Saus dapat ditempatkan di bawah bahan utama, dituangkan sebagian di atasnya, atau disajikan terpisah tergantung hidangan.

Jika saus memiliki rasa sangat kuat, gunakan lebih sedikit.

Tujuannya membuat setiap komponen terasa sebagai bagian dari satu hidangan.

Catat Perubahan ketika Bereksperimen

Jika sering memasak tanpa resep, catat perubahan penting.

Berapa banyak acidity yang digunakan?

Apakah sauce reduction berlangsung terlalu lama?

Kapan butter ditambahkan?

Apakah penggunaan stock tertentu memberikan hasil lebih baik?

Catatan sederhana membantu menghasilkan saus yang lebih konsisten pada percobaan berikutnya.

Memasak berdasarkan intuisi menjadi jauh lebih mudah setelah memiliki pengalaman yang dapat dibandingkan.

Kesimpulan

Memahami cara membuat saus enak bukan tentang mengumpulkan sebanyak mungkin bahan, melainkan mengetahui bagaimana rasa dan tekstur bekerja bersama. Garam memperkuat rasa, acidity memberikan kesegaran, sweetness dapat menyeimbangkan ketajaman, lemak memberikan body, sementara umami membantu menciptakan kedalaman.

Teknik seperti reduction, deglazing, thickening, dan emulsification juga membantu mengatur karakter saus. Namun, langkah paling penting tetap sederhana: cicipi selama memasak dan lakukan koreksi sedikit demi sedikit.

Ketika memahami prinsip tersebut, resep tidak lagi menjadi satu-satunya panduan. Anda dapat melihat apa yang kurang dari sebuah saus dan menyesuaikannya berdasarkan makanan yang sedang dibuat. Dengan latihan, cara membuat saus enak menjadi keterampilan yang dapat digunakan untuk berbagai hidangan, mulai dari pasta dan sayuran hingga daging, seafood, serta makanan rumahan sehari-hari.
Why Homemade Waffles Turn Soggy and How to Keep Them Crisp

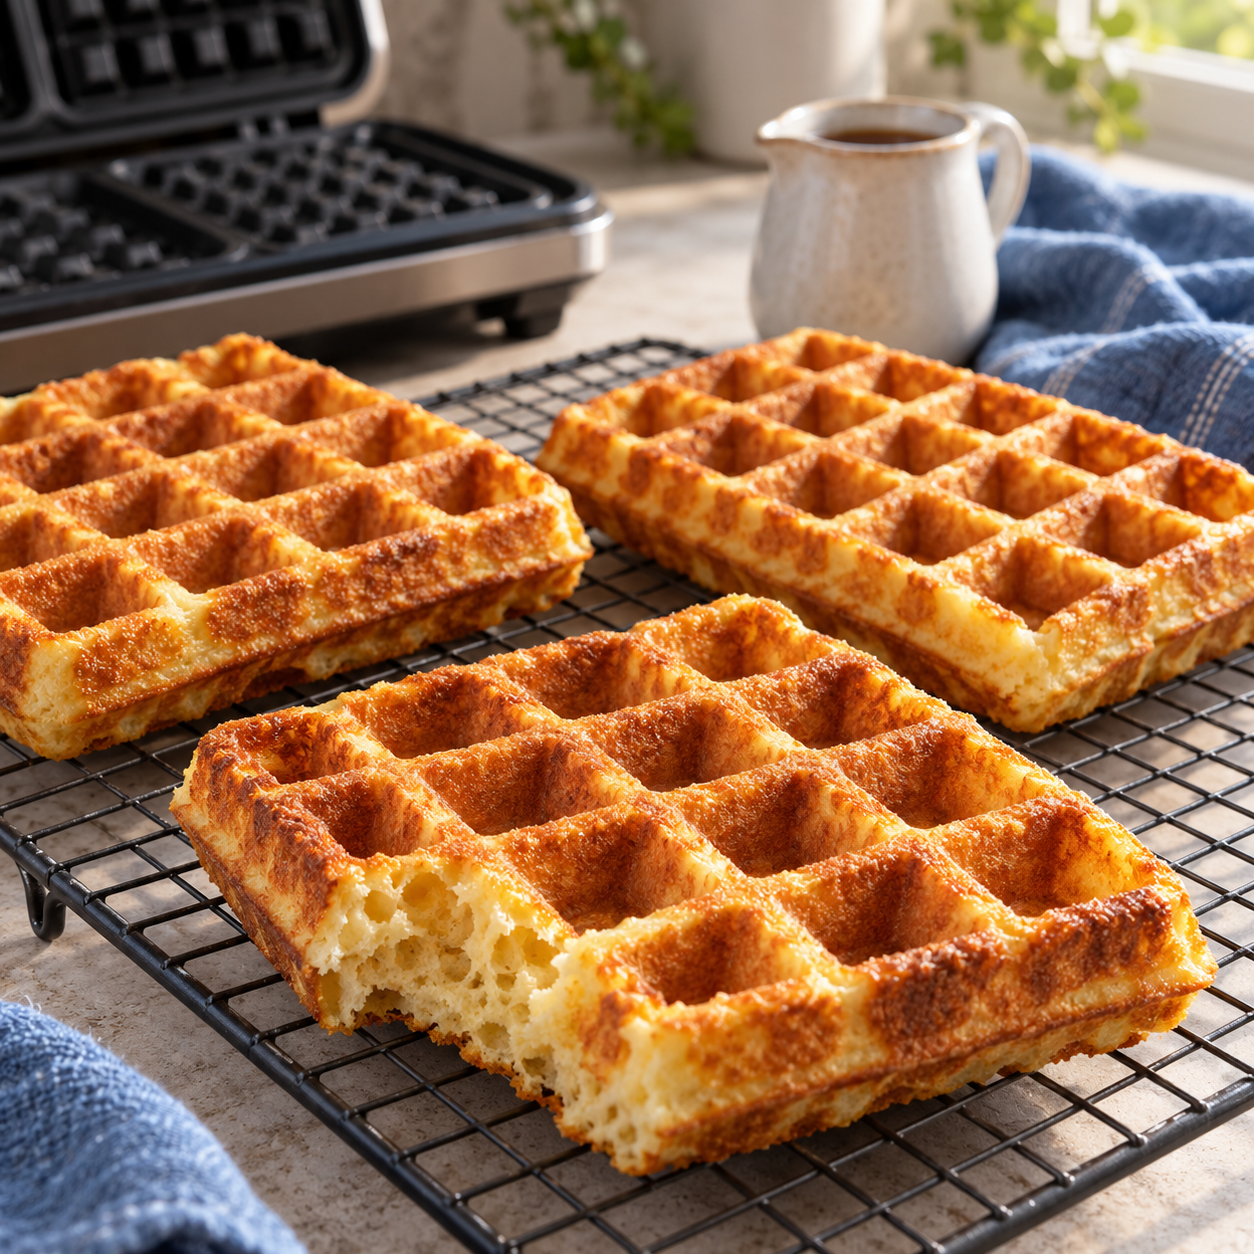
The first waffle comes out golden, with firm edges and a light crunch. By the time the rest of the batch is ready, it has softened on the plate. Stack several together, and the crisp texture can disappear before breakfast even begins.

Learning how to keep waffles crispy starts with understanding what happens after they leave the iron. A waffle continues releasing steam while it cools. If that moisture becomes trapped against a plate or another waffle, the surface can soften.

The batter and cooking method matter too. A pale waffle with a damp interior will be harder to keep crisp than one that has cooked evenly. The goal is to build a firm exterior, then give escaping moisture somewhere to go.

A Golden Surface Does Not Always Mean the Waffle Is Ready

Color is useful, but it should not be the only sign of doneness. Sugar, milk, and the temperature of the waffle iron can affect how quickly the outside browns.

A waffle may look golden while the center still needs more time. Removing it too early can leave excess moisture inside, which moves toward the crust as the waffle rests.

Watch for a combination of signs: a set exterior, easy release from the plates, and noticeably reduced steam. Steam does not need to disappear completely. Use the recipe and appliance instructions as your starting point, then adjust based on the finished texture.

Preheat the Iron before Adding Batter

Pouring batter into an iron that has not fully heated can produce uneven results. The batter begins cooking against a cooler surface, making it harder to establish a crisp shell before the interior sets.

Allow the appliance to complete its preheating cycle. If it has an adjustable temperature, begin with the setting recommended for your recipe rather than automatically choosing the highest level.

Give the iron time to recover between waffles as well. Adding another portion immediately may work with some appliances, but others need a short pause to return to temperature.

Consistent heat helps make crispy homemade waffles repeatable instead of leaving each waffle with a different texture.

Batter Thickness Affects the Finished Texture

An unusually thin batter can spread quickly and produce a different structure from the one the recipe intends. A very thick batter may struggle to fill the grid evenly and leave a heavy center.

Measure flour and liquid carefully before making adjustments. Scooping flour into a cup and packing it down can introduce more flour than expected, while adding extra milk by eye changes the balance again.

If the recipe calls for resting the batter, follow that step before judging its consistency. Flour absorbs liquid during the rest, so a batter that initially seems loose may thicken without additional ingredients.

Avoid trying to fix soggy waffles by adding large amounts of flour. That can create a denser result without solving the cooking or cooling problem.

Mix Enough to Combine, Then Stop

Once flour meets liquid, extended mixing can develop gluten and make waffles tougher. A perfectly smooth batter is not always necessary; small lumps are acceptable in many recipes.

Scrape the bottom of the bowl to incorporate dry pockets, but avoid repeatedly beating the batter after it has come together. If the recipe uses whipped egg whites, fold them in gently according to its instructions.

Different waffle styles need different methods. Yeasted batter, conventional baking-powder batter, and dough-based waffles should not be treated as interchangeable.

For Belgian-style waffles with a light interior, follow a recipe designed for that structure rather than relying on extra mixing to create volume.

Move Finished Waffles onto a Rack

A flat plate blocks airflow underneath the waffle. Moisture can collect between the hot waffle and the plate, softening the bottom even while the top still feels crisp.

Place freshly cooked waffles on a wire rack in a single layer. This allows steam to escape from both sides instead of gathering beneath them.

Stacking causes a similar problem. Each waffle releases moisture into the one above it, so a tall pile may look inviting while gradually losing its texture.

If you want to understand how to keep waffles crispy, changing where they rest is one of the simplest variables to test.

Keep a Batch Warm without Covering It

When cooking for several people, serving each waffle immediately is not always practical. A low oven can help hold the first waffles while the remaining portions cook.

Arrange them in a single layer on an oven-safe rack set over a baking tray. A starting point of around 100–120°C can work for brief holding, but check your oven and recipe because prolonged warming may dry them out.

Avoid covering hot waffles tightly with foil or placing them in a closed container. Those methods retain steam along with heat.

The aim is a short holding period with airflow, rather than keeping waffles warm indefinitely.

Add Toppings Just before Eating

Even a well-cooked waffle will soften when it absorbs syrup, fruit juices, or other wet toppings. That change is expected, but its timing can be controlled.

Bring the waffles to the table first, then add toppings when each portion is ready to eat. If serving juicy fruit, spoon it on shortly before serving rather than letting it sit on the waffles while the batch finishes.

Keep extra syrup and sauces on the side. This lets each person choose the amount while preserving more of the crisp surface.

For waffles prepared ahead, cool them on a rack before storing. Reheat with dry heat in a toaster or oven, following the appliance instructions, rather than expecting a microwave to restore the crust.

Conclusion

Knowing how to keep waffles crispy means paying attention to cooking, cooling, and serving. Start with a fully preheated iron, measure the batter consistently, and allow each waffle to cook beyond surface color alone.

After cooking, use a rack, avoid stacking, and add wet toppings at the last moment. If the result is still disappointing, change one step at a time. That makes it easier to identify whether the problem begins in the batter or develops while the waffles wait to be served.


The Stew Has Been Simmering for Hours, So Why Does the Flavor Still Taste Flat?

The pot has been on the stove all afternoon.

The onions were browned.

The meat is tender.

The sauce has reduced.

The kitchen smells incredible.

Everything suggests the stew should taste deep, rich, and comforting.

Then you take the first spoonful.

It is not bad.

But somehow, it feels unfinished.

The sauce tastes heavy rather than complex. The meat is tender but strangely forgettable. Adding more salt helps slightly, yet the dish still lacks the depth you expected after several hours of cooking.

This is where an important lesson about building flavor in stew becomes clear: time alone does not create complexity.

A great stew develops flavor in layers. Browning, aromatics, seasoning, cooking liquid, acidity, bitterness, sweetness, reduction, texture, and the final adjustment all contribute something different.

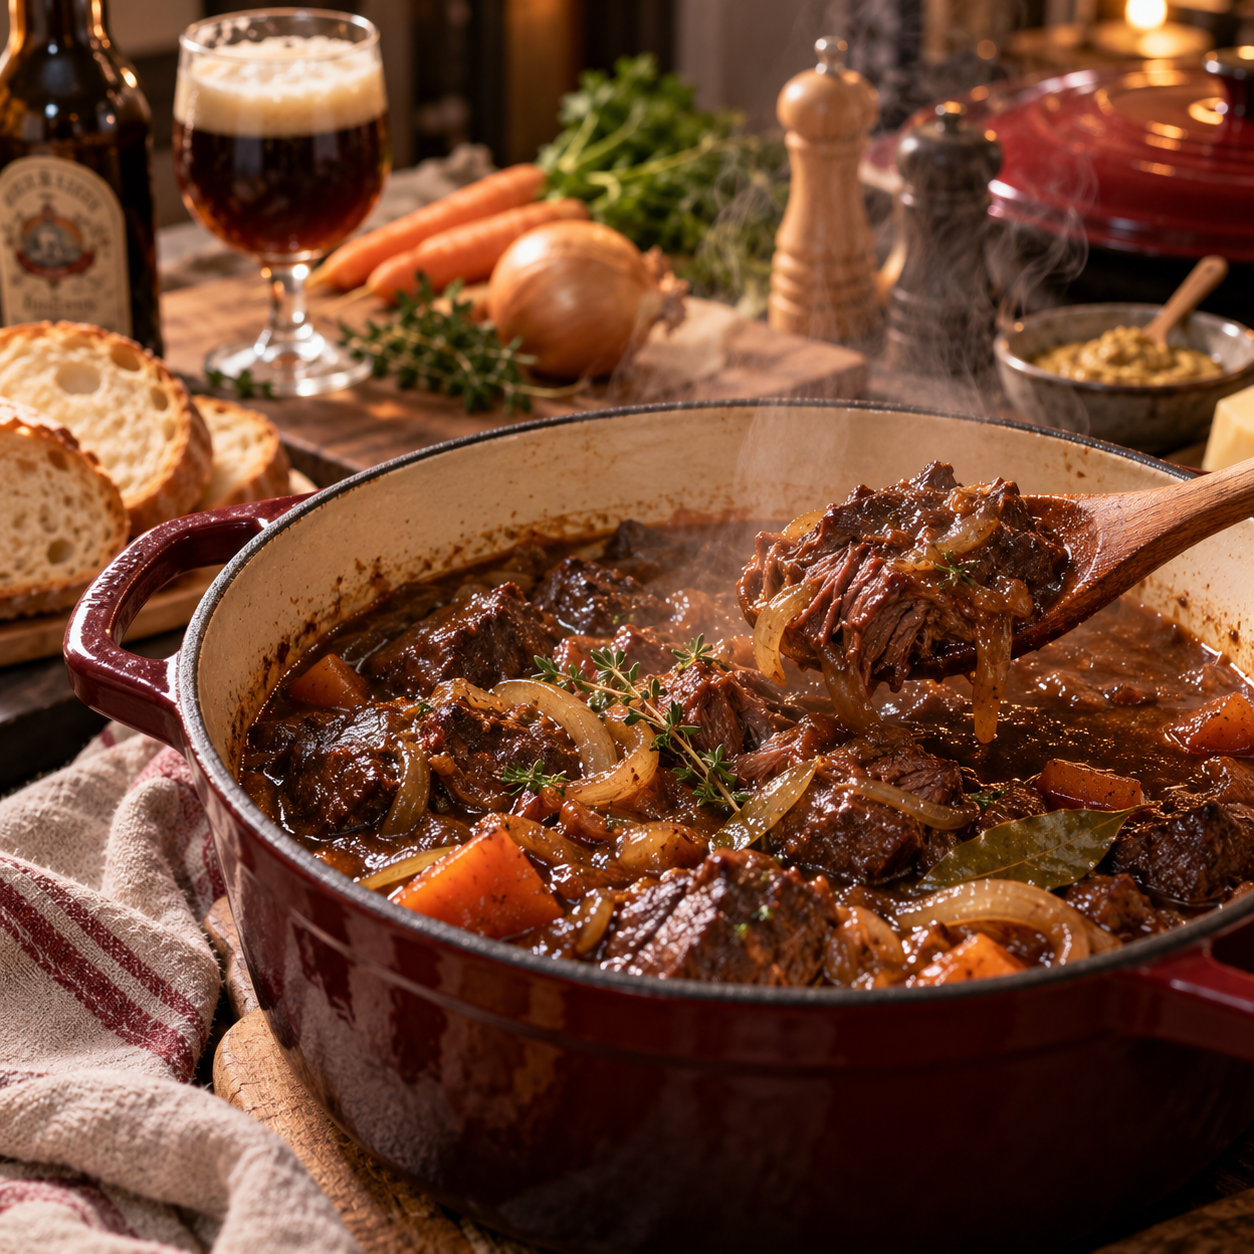
Belgian cooking offers an especially useful way to understand this idea. Traditional dishes such as carbonnade flamande use slowly braised meat, onions, beer, mustard, herbs, and sometimes bread or other subtly sweet elements to create a balance that is much more interesting than simply “meat cooked for a long time.” National Geographic

Long Cooking Does Not Automatically Mean Deep Flavor

Slow cooking can do several useful things.

It can soften tougher cuts of meat.

It allows ingredients to exchange flavors.

Liquid gradually reduces.

Connective tissue changes.

A sauce can become thicker and more integrated.

But slow cooking cannot create flavors that were never developed in the first place.

If the meat entered the pot without sufficient browning, the aromatics were barely cooked, the liquid lacked character, and the seasoning was never adjusted, four hours of simmering will not magically solve everything.

Time develops what you give it.

That is why the work done before the lid goes on matters so much.

Browning the Meat Builds the First Layer

One of the easiest ways to create a richer stew is to brown the meat properly.

The goal is not simply changing raw meat from pink to grey.

You want actual browning on the surface.

That browned exterior creates roasted, savory flavors that later become part of the sauce.

But there is a common mistake.

The pan is filled with too much meat at once.

The temperature drops.

Moisture escapes.

Instead of browning, the meat begins steaming in its own liquid.

The result will still cook.

It simply loses an opportunity to build another layer of flavor.

Work in Batches When Necessary

If your pan cannot comfortably hold all the meat with some space around the pieces, divide it into batches.

Yes, it takes longer.

But stew is already a slow dish.

Saving five minutes at the beginning can remove an important source of flavor from something you will cook for several hours.

Heat the pan properly.

Add an appropriate amount of cooking fat.

Place the meat down.

Give the surface enough contact time to develop color.

Then turn it.

You are building the foundation before any liquid enters the pot.

Do Not Keep Moving the Meat

Another common problem is impatience.

Meat goes into the pan.

Immediately it gets stirred.

Then stirred again.

And again.

Browning requires contact.

If every piece is constantly moving, the surface spends less time directly against the hot pan.

Put it down.

Give it time.

Check one piece.

If the color is developing properly, continue.

Cooking sometimes improves when we stop touching things.

The Brown Bits in the Pot Are Valuable

After browning meat, the bottom of the pot may look dirty.

Brown residue sticks to the surface.

Do not automatically scrub it away.

Those browned deposits can become part of the sauce.

When liquid is added later, gently scrape the bottom of the pot.

The concentrated browned material dissolves back into the cooking liquid.

This process helps connect the flavor created during searing with the stew itself.

Of course, there is an important distinction.

Brown is useful.

Burned black residue is not.

Burnt Flavor Will Not Become Better After Three Hours

If the bottom of the pot has genuinely burned, continuing the recipe can spread bitterness throughout the entire dish.

Do not assume:

“It will disappear during cooking.”

It probably will not.

If necessary, transfer the usable ingredients to another pot and leave the burned material behind.

A little bitterness can create complexity in certain recipes.

Burnt food is different.

Learning to distinguish deep browning from burning is one of those kitchen skills that becomes easier through repetition.

Onions Need Enough Time Too

Many stew recipes begin with onions.

But “add onions” can produce very different results depending on how they are cooked.

Onions cooked briefly may contribute freshness and a sharper aromatic quality.

Onions cooked longer become softer, sweeter, and deeper.

Neither is universally correct.

For a rich braise, however, giving onions enough time to soften and develop some color can create a stronger foundation.

Carbonnade flamande is a good example of how beef, onions, beer, mustard, and slow cooking can work together rather than relying on meat alone. Belgium

Aromatics Should Support the Dish, Not Compete With It

Garlic.

Onion.

Shallot.

Celery.

Carrot.

Leek.

Herbs.

Spices.

All can contribute flavor.

That does not mean every stew needs all of them.

A common mistake in home cooking is believing complexity requires more ingredients.

Sometimes complexity comes from developing a smaller number of ingredients properly.

Belgian food is particularly interesting in this respect because many traditional dishes appear relatively straightforward while using careful combinations of mustard, herbs, beer, cream, vegetables, or sweet-and-sour elements to create depth. National Geographic

Seasoning Should Happen in Stages

Waiting until the very end to add all the salt can make seasoning more difficult.

Instead, think in layers.

Season the meat appropriately.

Build the aromatic base.

Taste the cooking liquid when practical.

Adjust again toward the end.

This does not mean aggressively salting every stage.

Remember that stew reduces.

As water evaporates, dissolved flavors—including salt—become more concentrated.

A liquid that tastes perfectly salty early in cooking can become too salty after significant reduction.

Season progressively.

Taste repeatedly.

Salt and Flavor Are Not the Same Thing

When food tastes flat, the automatic reaction is often:

“Add more salt.”

Sometimes that is exactly what it needs.

But not always.

A dish can contain enough salt and still feel one-dimensional.

What may be missing is acidity.

Or aromatic freshness.

Or bitterness.

Or sweetness.

Or roasted flavor.

Or simply enough reduction.

Understanding this distinction prevents the endless cycle of adding salt until the dish becomes salty without becoming more interesting.

Acidity Can Wake Up a Heavy Stew

Rich dishes often benefit from some acidity.

Why?

Because fat, gelatin, meat, and long-cooked ingredients can create a very round, heavy flavor profile.

A small acidic element can provide contrast.

Depending on the recipe, this could come from:

vinegar,

mustard,

wine,

certain beers,

tomato,

or another acidic ingredient.

The goal is not necessarily making the stew taste sour.

Often the correct amount is just enough to make everything else taste clearer.

Add Acid Carefully

Suppose a finished stew tastes dull.

Adding a large amount of vinegar directly into the pot is risky.

Instead, take a spoonful of stew into a small bowl.

Add one or two drops of acid.

Taste it.

Did the flavor become brighter?

If yes, you have useful information.

Then adjust the main pot gradually.

This small test is one of the safest ways to troubleshoot food.

Do not experiment with the entire dinner when you can experiment with one spoonful.

Belgian Cooking Understands Sweet-and-Sour Balance

One fascinating feature of Belgian culinary tradition is its use of contrasting flavors.

Historical Belgian cooking commonly combines elements such as mustard, vinegar, dried fruit, spices, and sweet components to create sweet-sour or sweet-salty balances rather than relying on one dominant taste. National Geographic

That principle remains useful even outside traditional Belgian recipes.

Richness becomes more interesting when something contrasts with it.

Sweetness can soften bitterness.

Acidity can cut richness.

Mustard can add sharpness.

Herbs can provide freshness.

The objective is balance, not maximum intensity.

Beer Is More Than Just Liquid

Belgian cuisine provides one of the clearest examples of using beer as an actual cooking ingredient.

In carbonnade flamande, beer contributes flavor to the braising liquid alongside onions and other seasonings. Darker beers can bring malt character, bitterness, sweetness, and roasted notes that water simply cannot provide. Belgium

But this leads to another important principle:

The cooking liquid matters.

If a recipe relies heavily on broth, beer, wine, tomatoes, or another liquid, its flavor will influence the finished sauce.

Do not treat the liquid as meaningless volume.

More Beer Does Not Automatically Mean More Belgian Flavor

If a recipe uses beer, choose it with intention.

Different beers can behave differently.

Some are sweeter.

Some more bitter.

Some lighter.

Some strongly aromatic.

A beer that tastes aggressively bitter before cooking may become even more noticeable after reduction.

The safest approach is following a tested recipe until you understand how the ingredient behaves.

Once you understand the balance, experimentation becomes easier.

Water Is Not Always the Enemy

There is also no need to believe every drop of liquid must be intensely flavored.

Water can be perfectly useful.

Sometimes stock is too salty.

Sometimes beer would overwhelm the dish.

Sometimes the other ingredients already provide enough flavor.

The important question is not:

“Is water allowed?”

It is:

“What does this dish need?”

Good cooking is not about making every ingredient powerful.

It is about making the final combination balanced.

Stock Should Taste Good Before It Enters the Pot

If using stock, taste it.

This sounds obvious, but it is frequently skipped.

Is it very salty?

Very weak?

Extremely concentrated?

Does it have an artificial flavor that may dominate after reduction?

Remember that the liquid will become part of the final sauce.

If you would not want its flavor concentrated, be careful about adding a large amount.

Reduction Concentrates More Than Flavor

Removing water through simmering can deepen a sauce.

But reduction concentrates everything.

Salt.

Bitterness.

Sweetness.

Acidity.

Spices.

If the balance is wrong before reduction, it can become even more wrong afterward.

This is why you should not aggressively season a sauce that still has a long way to reduce.

Allow the cooking process to develop.

Then make the final adjustment.

A Watery Stew May Simply Need More Reduction

The meat is tender.

The vegetables are cooked.

But the sauce looks thin.

Before reaching immediately for flour or starch, consider whether the liquid simply needs additional reduction.

Remove the lid if appropriate.

Simmer gently.

Allow excess water to evaporate.

Taste as it changes.

Sometimes concentration provides both the texture and flavor that were missing.

But Do Not Destroy Perfectly Cooked Meat While Reducing the Sauce

There is another side to this.

If the meat is already beautifully tender but the sauce still needs significant reduction, continuing to boil everything together may overcook the meat.

One option is removing the meat temporarily.

Reduce the sauce separately.

Then return the meat to warm through.

This gives you more control over two different problems:

meat doneness and sauce consistency.

They do not always finish at exactly the same time.

Thick and Flavorful Are Different Things

A thick sauce can still taste bland.

A thin sauce can be intensely flavorful.

Texture influences our experience of food, but thickness should not be confused with concentration.

Adding flour, cornstarch, or another thickener changes consistency.

It does not automatically create depth.

Before thickening, taste.

Does the sauce already have the flavor you want?

If not, fix the flavor first.

Bread Can Be More Than Something Served on the Side

Some traditional versions of Flemish stew use bread—often with mustard—as part of the braise, helping contribute body and flavor to the sauce. Wikipedia

This is a useful reminder that traditional cooking often solves multiple problems with one ingredient.

An ingredient may provide:

flavor,

texture,

thickening,

aroma,

and cultural identity

at the same time.

Understanding function makes recipes easier to adapt intelligently.

Mustard Can Provide More Than Heat

Mustard is another ingredient that appears frequently in Belgian-style savory cooking.

Its role is not simply making food spicy.

Depending on the mustard and quantity, it can contribute acidity, aroma, sharpness, and complexity.

In a long-cooked dish, some of its aggressive raw character may soften while still supporting the sauce.

Again, balance matters.

You should not necessarily taste the stew and immediately think:

“Mustard.”

The ingredient can work quietly in the background.

Sweetness Needs Restraint

Rich savory dishes sometimes benefit from a small amount of sweetness.

Caramelized onions already provide some.

Certain beers add more.

Traditional recipes may incorporate bread, brown sugar, syrup, dried fruit, or spiced bread depending on regional and household variation. Wikipedia

But sweetness should usually support the savory profile rather than turn the stew into dessert.

Add carefully.

Once a savory sauce becomes obviously too sweet, correcting it becomes more difficult.

Bitterness Can Be Useful

Home cooks often treat bitterness as something that must disappear completely.

But controlled bitterness can make food more complex.

Dark beer.

Certain greens.

Caramelization.

Mustard.

Some herbs.

These can contribute subtle bitter notes.

The key word is subtle.

Balanced bitterness can prevent a rich dish from feeling overly sweet or heavy.

Excessive bitterness dominates everything.

Fat Carries Flavor, but Too Much Can Mute It

A stew with some fat often tastes satisfying.

Fat contributes mouthfeel and carries aromatic compounds.

But a thick layer of grease floating on top can make the dish feel heavy and obscure more delicate flavors.

If necessary, skim excessive fat during or after cooking.

Another useful method is chilling the stew.

Once cold, excess fat can solidify at the surface and become easier to remove.

Then the stew can be reheated.

Some Stews Really Do Taste Better the Next Day

This familiar observation has practical reasons.

After cooling and resting, flavors can seem more integrated.

Fat can also be removed more easily.

And because you are no longer tasting the dish after standing over its aroma for several hours, your perception may feel fresher too.

This makes many braised dishes excellent candidates for cooking ahead.

But refrigeration still needs to be handled safely.

Cool and store cooked food appropriately rather than leaving a large warm pot sitting out indefinitely.

Your Nose Can Become Tired Before Dinner

There is a surprisingly simple reason a cook may think a dish lacks aroma.

You have smelled it for three hours.

Everyone entering the house says:

“That smells amazing.”

You taste it and think:

“Really?”

Constant exposure can reduce your perception of an aroma.

Step away from the kitchen for a few minutes.

Drink some water.

Return.

Taste again.

Sometimes the recipe has not changed.

Your senses have.

Fresh Herbs and Long-Cooked Herbs Do Different Jobs

Herbs added early have time to integrate into the cooking liquid.

Their flavor becomes part of the background.

Fresh herbs added near the end can provide a brighter aroma.

That means the same herb can perform different functions depending on timing.

For a long braise, sturdy herbs may be appropriate earlier.

Delicate herbs are often more noticeable when added later.

You do not necessarily have to choose one timing.

Some recipes benefit from both.

Spices Can Lose Their Identity in a Long Cook

Adding every spice at the beginning and simmering for several hours does not guarantee maximum flavor.

Some aromas change substantially with prolonged cooking.

Others become muted.

For recipes that use spices, consider what role each spice is supposed to play.

Deep background warmth?

Add earlier.

Fresh aromatic lift?

A later addition may sometimes be useful.

Again, follow the logic of the recipe rather than assuming longer always means stronger.

Vegetables Need Their Own Timing

Put every vegetable into the pot at the beginning and you may end up with one uniform texture.

That might be exactly what a particular stew requires.

Or it might not.

Root vegetables can usually tolerate longer cooking.

More delicate vegetables may become extremely soft.

If you want different textures in the finished dish, stagger the additions.

Flavor is not only taste and aroma.

Texture changes how we perceive the entire meal.

Waterzooi Shows a Completely Different Kind of Depth

Belgian comfort food is not limited to dark, heavy braises.

Waterzooi, associated with Ghent, demonstrates another approach.

Modern versions are commonly prepared with chicken, although fish versions are also traditional, and the dish combines vegetables with a broth enriched by cream and egg yolk. Brussels Tourism Guide

Its depth is gentler.

There is no requirement for every comforting dish to be dark, intensely roasted, or aggressively reduced.

Richness can also come from delicacy, texture, and careful seasoning.

Do Not Boil Every Creamy Sauce Aggressively

Once dairy or egg-based finishing elements enter a sauce, temperature control becomes especially important.

A violently boiling pot is not automatically better because it looks active.

Gentle heat gives the cook more control.

This is another broader lesson from building flavor in stew:

Different stages require different heat.

High heat may be useful when browning.

Low, steady heat may be better during braising.

Gentle finishing may be appropriate later.

One burner setting does not need to remain unchanged for the entire recipe.

Stoemp Shows Why Texture Matters

Stoemp combines mashed potatoes with vegetables and can be served with various savory accompaniments. It is deliberately more rustic than a perfectly smooth restaurant-style purée. All About City

That texture is part of the experience.

This matters beyond Belgian food.

Home cooks sometimes assume smoother, finer, and more refined automatically mean better.

Not always.

Rustic texture can provide contrast.

Chunks can make a dish feel substantial.

Crispy elements can make something creamy more interesting.

Good cooking controls texture rather than automatically eliminating it.

A Rich Main Dish Often Needs a Simple Companion

If the stew is already intense, the side dish does not always need to compete.

Potatoes.

Bread.

A simple vegetable.

Fries.

Something fresh.

A relatively neutral accompaniment can give a strong sauce somewhere to go.

This is why traditional combinations often make sense beyond habit.

The components balance each other.

Belgian cuisine frequently pairs deeply flavored stews with potatoes or fries, allowing the starch to carry the sauce rather than introducing another equally complicated flavor profile. National Geographic

Taste the Sauce Separately From the Meat

When troubleshooting a stew, taste its components.

Try the sauce alone.

Then the meat.

Then a vegetable.

This can reveal where the problem actually is.

Maybe the sauce is excellent but the meat was underseasoned.

Maybe the meat is flavorful but the liquid is weak.

Maybe everything tastes good individually but the sauce is too fatty.

Breaking the dish into parts makes diagnosis easier.

Ask What Is Missing, Not Just Whether It Is Good

Instead of tasting and thinking:

“I don’t like it.”

Ask more specific questions.

Does it need salt?

Acidity?

Sweetness?

Aroma?

More reduction?

More body?

Freshness?

Is it too bitter?

Too fatty?

Too salty?

Too sweet?

Specific questions lead to specific corrections.

Vague dissatisfaction often leads to random additions.

Fix One Problem at a Time

Imagine the stew tastes flat.

You add salt, vinegar, sugar, mustard, pepper, and herbs all at once.

Now it tastes different.

But you have no idea which adjustment helped.

Instead, change one variable.

Taste.

Then decide what happens next.

This is one of the easiest ways to become a better cook.

Treat the pot like an experiment.

Observe before changing it.

Use a Small Bowl for Risky Adjustments

Unsure whether mustard will help?

Take a spoonful out.

Unsure about vinegar?

Test it separately.

Wondering whether a little sweetness would balance the bitterness?

Experiment with a small portion.

If it tastes terrible, you lost one spoonful.

If it works, you now have a direction for the entire pot.

This habit dramatically reduces the fear of adjusting recipes.

Do Not Keep Adding Ingredients Just Because the Flavor Is Complex

Complexity does not come from ingredient count.

A stew containing twenty seasonings can taste confused.

A dish containing six carefully developed ingredients can taste deep.

Carbonnade is a good illustration: its identity comes from the relationship among braised meat, onions, beer, mustard, aromatics, and slow cooking—not from an enormous spice cabinet being emptied into the pot. Belgium

Restraint allows individual flavors to remain understandable.

The Final Five Minutes Matter

After hours of cooking, it is tempting to think the work is finished.

The meat is tender.

Dinner is ready.

Not quite.

Taste the sauce one final time.

Check salt.

Check acidity.

Check consistency.

Check sweetness.

Remove excessive fat if necessary.

Add any fresh finishing element the recipe requires.

The final adjustment can be the difference between a stew that tastes merely cooked and one that tastes complete.

Garnish Should Have a Purpose

A garnish is not automatically useful because it makes the bowl prettier.

Fresh herbs can provide aroma.

Something crisp can add texture.

A small acidic component can balance richness.

Bread can carry sauce.

A creamy element can soften spice.

Choose garnish because it improves the eating experience.

Not because an empty corner of the bowl makes you uncomfortable.

Traditional Food Is a Technique Library

Belgian dishes are valuable not only because they are traditional.

They demonstrate principles that can be used elsewhere.

Carbonnade teaches how beer, browning, slow cooking, mustard, and contrasting flavors can build a dark braise.

Waterzooi shows how broth, vegetables, cream, and egg can produce a gentler form of comfort food.

Stoemp demonstrates how humble ingredients and rustic texture can become satisfying when handled thoughtfully. Brussels Tourism Guide

Learning traditional recipes is therefore not just about reproducing them.

It teaches us how cooks solved flavor problems long before modern kitchen gadgets existed.

Do Not Confuse Authenticity With One Universal Recipe

Traditional food changes between regions, families, restaurants, and generations.

Carbonnade alone has numerous variations in beer choice, sweetening ingredients, seasoning, and thickening methods. Wikipedia

That does not mean technique is irrelevant.

It means food culture is living.

Learn the traditional structure first.

Understand what each ingredient contributes.

Then adaptations become informed choices rather than random substitutions.

Write Down What Worked

If you make an excellent stew, record what you did.

Which cut of meat?

How much liquid?

Which cooking vessel?

How long did you brown the onions?

How long did it simmer?

Lid on or off?

What adjustment did you make at the end?

Home cooking often relies on memory.

Memory is less reliable than we think.

A few notes can turn one lucky dinner into a repeatable recipe.

The Goal Is Not Maximum Flavor

This sounds strange, but it matters.

More salt.

More acidity.

More caramelization.

More spices.

More beer.

More herbs.

More reduction.

If every element is pushed to maximum intensity, the dish can become exhausting.

Great food is not always loud.

The goal is balance.

You should be able to take another bite without one element constantly demanding attention.

Sometimes the ingredient a stew needs most is not another ingredient.

It is restraint.

Conclusion

A stew can simmer for hours and still taste flat because building flavor in stew depends on much more than cooking time.

Deep flavor begins before the liquid even enters the pot.

Brown the meat properly.

Give aromatics enough attention.

Use cooking liquid intentionally.

Season in stages.

Understand how reduction concentrates everything.

Balance richness with acidity, bitterness, sweetness, and freshness when the recipe calls for them.

Then taste again before serving.

Belgian dishes such as carbonnade flamande are useful reminders that humble ingredients can produce remarkable complexity when each one has a clear purpose. National Geographic

The secret is not simply leaving a pot on the stove longer.

It is knowing what should happen during those hours.

Because the best slow-cooked food is not merely tender.

Every spoonful tastes as though each layer had enough time—and enough attention—to become part of the whole.

Makanan Sudah Dibumbui Sesuai Resep, Jadi Kenapa Rasanya Tetap Terasa Datar?

Garam sudah masuk.

Lada sudah cukup.

Bawang, rempah, dan saus juga sudah digunakan.

Saat dicicipi, rasanya sebenarnya tidak buruk.

Tetapi ada sesuatu yang kurang.

Rasanya seperti berhenti di lidah tanpa meninggalkan kesan. Tambah garam lagi justru membuat makanan terlalu asin. Tambah bumbu semakin banyak malah membuat rasa mulai berantakan.

Masalahnya belum tentu kekurangan bumbu.

Sering kali yang kurang adalah keseimbangan rasa masakan.

Masakan yang terasa hidup biasanya tidak bergantung pada satu rasa yang sangat kuat. Asin, manis, asam, pahit, umami, aroma, lemak, tekstur, dan suhu bekerja bersama. Ketika salah satunya terlalu dominan atau tidak memiliki pasangan yang tepat, makanan dapat terasa datar meskipun daftar bumbunya panjang.

Garam Bukan Jawaban untuk Semua Masakan yang Hambar

Reaksi paling spontan ketika makanan terasa kurang adalah menambahkan garam.

Kadang itu memang tepat.

Garam membantu memperjelas rasa bahan lain. Sup yang terasa seperti air dapat berubah jauh lebih baik setelah seasoning diperbaiki.

Tetapi ada titik ketika tambahan garam tidak lagi memperkuat rasa.

Makanan hanya menjadi lebih asin.

Jika masakan sudah cukup asin tetapi masih terasa berat atau membosankan, berhentilah menambahkan garam dan cari masalah di tempat lain.

Mungkin hidangan membutuhkan sedikit keasaman.

Mungkin aromanya kurang.

Mungkin teksturnya terlalu seragam.

Atau mungkin semua komponennya memiliki karakter yang terlalu berat sehingga tidak ada sesuatu yang memberikan kontras.

Memahami perbedaan ini merupakan dasar penting dalam membangun keseimbangan rasa masakan.

Sedikit Asam Bisa Mengubah Hidangan yang Terasa Berat

Bayangkan semangkuk stew yang dimasak lama.

Daging empuk.

Kuah kaya.

Bumbu sudah terasa.

Namun setelah beberapa sendok, hidangan mulai terasa berat.

Menambahkan lebih banyak garam mungkin tidak menyelesaikan masalah tersebut. Sedikit elemen asam justru dapat memberikan kontras yang dibutuhkan.

Keasaman dapat berasal dari berbagai bahan tergantung jenis masakan: lemon, lime, vinegar, tomat, yogurt, mustard, atau bahan fermentasi tertentu.

Tujuannya bukan membuat hidangan terasa asam.

Jumlah yang tepat justru mungkin hampir tidak dikenali sebagai rasa tersendiri. Fungsinya adalah memberikan brightness sehingga komponen lain terasa lebih jelas.

Inilah alasan sedikit perasan lemon menjelang penyajian dapat mengubah makanan yang sebelumnya terasa berat menjadi jauh lebih segar.

Manis Juga Bukan Hanya untuk Dessert

Gula sering dianggap hanya berkaitan dengan makanan penutup.

Padahal rasa manis dalam jumlah kecil dapat membantu menyeimbangkan masakan savory.

Saus tomat yang terlalu tajam, dressing yang sangat asam, atau glaze dengan rasa kuat terkadang mendapatkan keseimbangan setelah sedikit unsur manis ditambahkan.

Tetapi prinsip yang sama berlaku: kita tidak sedang mencoba membuat semuanya terasa manis.

Jika gula dapat langsung dikenali padahal hidangan seharusnya savory, mungkin jumlahnya sudah terlalu banyak.

Rasa manis juga tidak selalu harus berasal dari gula putih.

Bawang yang dimasak perlahan, wortel, madu, buah, atau bahan lain dapat memberikan sweetness dengan karakter berbeda.

Pemilihan sumber rasa sebaiknya mengikuti hidangannya.

Lemak Membawa Rasa, tetapi Juga Bisa Menutupnya

Butter, cream, minyak, keju, dan lemak dari daging dapat memberikan richness yang membuat makanan terasa memuaskan.

Lemak juga membantu membawa berbagai senyawa aroma sehingga pengalaman makan terasa lebih penuh.

Namun richness memiliki sisi lain.

Terlalu banyak lemak tanpa kontras dapat membuat lidah cepat lelah.

Itulah sebabnya makanan kaya lemak sering terasa lebih seimbang ketika dipasangkan dengan sesuatu yang asam, segar, pahit ringan, atau renyah.

Bayangkan makanan goreng.

Bagian luarnya renyah dan kaya minyak. Ketika dipasangkan dengan acar, lemon, slaw, atau saus dengan acidity, pengalaman makannya berubah.

Kontras tersebut bukan kebetulan.

Satu elemen memberikan richness, sementara elemen lain membantu membersihkan dan menyegarkan palate.

Umami Memberikan Kedalaman, Bukan Sekadar Rasa Asin

Ada masakan yang sudah memiliki garam cukup tetapi tetap terasa tipis.

Di sinilah umami dapat berperan.

Tomat matang, jamur, keju tertentu, kaldu, kecap, bahan fermentasi, dan berbagai bahan kaya glutamat dapat memberikan kesan savory yang lebih dalam.

Namun menambahkan sumber umami tanpa memperhatikan kandungan garamnya juga dapat menimbulkan masalah.

Beberapa bahan yang kaya umami sekaligus memiliki kadar garam tinggi.

Jika seasoning sudah agresif sejak awal, ruang untuk menambahkan komponen tersebut menjadi semakin sempit.

Karena itu, membumbui secara bertahap biasanya lebih mudah dikontrol daripada memasukkan banyak garam di awal kemudian mencoba memperbaikinya di akhir.

Aroma Bisa Membuat Rasa Terasa Lebih Kompleks

Apa yang kita sebut “rasa” sebenarnya sangat dipengaruhi aroma.

Itulah sebabnya makanan terasa jauh kurang menarik ketika hidung tersumbat.

Dalam memasak, waktu memasukkan bahan aromatik dapat menentukan hasil.

Bawang putih yang dimasak sejak awal memberikan karakter berbeda dibandingkan bawang putih segar yang ditambahkan mendekati akhir.

Herbs yang dimasak lama juga berbeda dengan herbs segar yang digunakan sebagai finishing.

Rempah tertentu dapat menjadi lebih aromatik setelah dipanaskan sebentar dalam minyak, tetapi dapat berubah pahit jika terbakar.

Jadi ketika makanan terasa datar, jangan hanya bertanya:

“Kurang bumbu apa?”

Tanyakan juga:

“Kurang aroma segar atau tidak?”

Sedikit herbs, citrus zest, rempah yang tepat, atau finishing oil kadang memberikan perubahan lebih besar daripada satu sendok tambahan seasoning.

Tekstur Juga Mempengaruhi Bagaimana Kita Menilai Rasa

Bayangkan pasta dengan saus creamy.

Rasanya bagus.

Namun pasta, saus, dan seluruh topping memiliki tekstur lembut yang hampir sama.

Setelah beberapa suapan, pengalaman makan mulai terasa monoton.

Tambahkan sesuatu yang renyah dan hidangan tiba-tiba terasa lebih menarik meskipun komposisi rasa utamanya hampir tidak berubah.

Crouton.

Kacang panggang.

Breadcrumb.

Sayuran segar.

Kulit yang dipanggang sampai crispy.

Elemen seperti ini menciptakan kontras.

Karena itu, keseimbangan rasa masakan sebenarnya tidak sepenuhnya tentang rasa dasar. Tekstur ikut menentukan apakah setiap suapan terasa menarik atau melelahkan.

Browning Bisa Memberikan Rasa yang Tidak Bisa Digantikan Bumbu

Daging yang hanya berubah warna menjadi abu-abu tidak memiliki karakter yang sama dengan daging yang mendapatkan crust kecokelatan.

Jamur yang penuh air dan direbus dalam wajannya sendiri berbeda dari jamur yang mendapatkan permukaan caramelized.

Sayuran panggang juga memiliki rasa berbeda dari sayuran rebus meskipun menggunakan bahan yang sama.

Browning menciptakan lapisan rasa baru.

Kesalahan yang sering terjadi adalah memasukkan terlalu banyak bahan sekaligus ke dalam pan. Suhu turun, air keluar, dan makanan akhirnya steaming alih-alih mendapatkan warna.

Kemudian kita mencoba mengganti rasa yang hilang dengan lebih banyak seasoning.

Padahal masalahnya berada pada teknik memasak.

Terkadang solusi untuk makanan yang terasa kurang bukan menambahkan bahan baru, tetapi memberikan proses memasak yang tepat kepada bahan yang sudah ada.

Seasoning Sebaiknya Dibangun Bertahap

Membumbui hanya pada akhir proses membuat kita harus memperbaiki seluruh hidangan sekaligus.

Pendekatan yang lebih terkontrol adalah membangun rasa dalam beberapa tahap.

Bumbui komponen utama secukupnya.

Cicipi ketika struktur hidangan mulai terbentuk.

Periksa lagi setelah cairan berkurang karena proses reduksi dapat membuat rasa asin semakin terkonsentrasi.

Kemudian lakukan koreksi terakhir menjelang penyajian.

Cara ini memberikan lebih banyak kontrol.

Namun tetap hindari mencicipi secara obsesif setiap beberapa detik. Setelah terlalu lama berada di dapur, palate juga dapat mengalami kelelahan sehingga penilaian terhadap rasa menjadi kurang sensitif.

Sesekali berhenti, minum air, kemudian cicipi kembali.

Gunakan Pertanyaan Sederhana Saat Makanan Terasa Kurang

Tidak perlu memiliki kemampuan chef profesional untuk mulai mendiagnosis rasa.

Ketika masakan terasa kurang, jangan langsung mengambil garam.

Berhenti sebentar dan tanyakan apa yang sebenarnya dirasakan.

Apakah hambar?

Apakah sudah asin tetapi tetap datar?

Apakah terlalu berat?

Apakah terlalu manis?

Apakah terlalu tajam?

Apakah aromanya lemah?

Apakah semua teksturnya sama?

Apakah hidangan terasa kaya pada suapan pertama tetapi melelahkan setelah beberapa suapan?

Pertanyaan tersebut membantu mempersempit solusi.

Masakan yang terlalu berat mungkin membutuhkan acidity.

Terlalu asam mungkin membutuhkan sedikit sweetness atau richness.

Terlalu manis dapat membutuhkan acidity, bitterness, atau seasoning yang sesuai.

Terlalu lembut mungkin membutuhkan elemen renyah.

Dengan cara ini, koreksi dilakukan berdasarkan masalah, bukan dengan menambahkan bahan secara acak.

Jangan Mengubah Lima Hal Sekaligus

Ketika panik karena makanan belum terasa enak, mudah sekali memasukkan semuanya.

Sedikit garam.

Tambah gula.

Tambah saus.

Tambah lemon.

Tambah herbs.

Kemudian cicipi.

Jika sekarang rasanya aneh, kita tidak tahu perubahan mana yang menyebabkannya.

Lakukan koreksi sedikit demi sedikit.

Tambahkan satu elemen.

Aduk.

Berikan waktu agar tercampur.

Cicipi kembali.

Jika diperlukan, lanjutkan.

Memasak menjadi jauh lebih mudah ketika kita memperlakukannya sebagai proses membaca dan menyesuaikan, bukan mengikuti resep secara mekanis.

Resep Memberikan Struktur, Lidah Menentukan Hasil Akhir

Dua bawang tidak selalu memiliki ukuran yang sama.

Tomat memiliki tingkat keasaman berbeda.

Kaldu buatan sendiri tidak memiliki kadar garam yang sama dengan produk kemasan.

Lemon yang satu dapat menghasilkan juice lebih banyak daripada yang lain.

Keju juga memiliki intensitas berbeda.

Karena itu, angka dalam resep adalah panduan yang sangat berguna, tetapi kondisi bahan tetap menentukan penyesuaian akhir.

Kalimat “season to taste” bukan berarti resep menyerahkan semuanya kepada keberuntungan.

Artinya kita perlu mencicipi dan memahami apa yang masih dibutuhkan hidangan tersebut.

Kemampuan ini berkembang melalui latihan.

Semakin sering memasak sambil benar-benar memperhatikan rasa, semakin mudah mengenali apa yang hilang.

Kesimpulan

Masakan yang terasa datar tidak selalu membutuhkan lebih banyak garam atau lebih banyak bumbu.

Sering kali persoalannya berada pada keseimbangan rasa masakan.

Asin membutuhkan pasangan. Richness dapat membutuhkan acidity. Sweetness perlu dikontrol. Umami memberikan kedalaman. Aroma membuat rasa lebih hidup. Browning membangun kompleksitas, sementara tekstur menciptakan kontras yang membuat setiap suapan tetap menarik.

Karena itu, ketika resep sudah diikuti tetapi hasilnya masih terasa kurang, jangan langsung menambahkan semuanya.

Cicipi.

Identifikasi apa yang dominan dan apa yang hilang.

Kemudian ubah satu hal kecil.

Memasak yang baik bukan tentang menggunakan bumbu sebanyak mungkin.

Justru sering kali, perbedaan terbesar datang dari mengetahui kapan makanan sudah memiliki cukup banyak hal—dan hanya membutuhkan satu elemen kecil untuk membuat semuanya terasa seimbang.

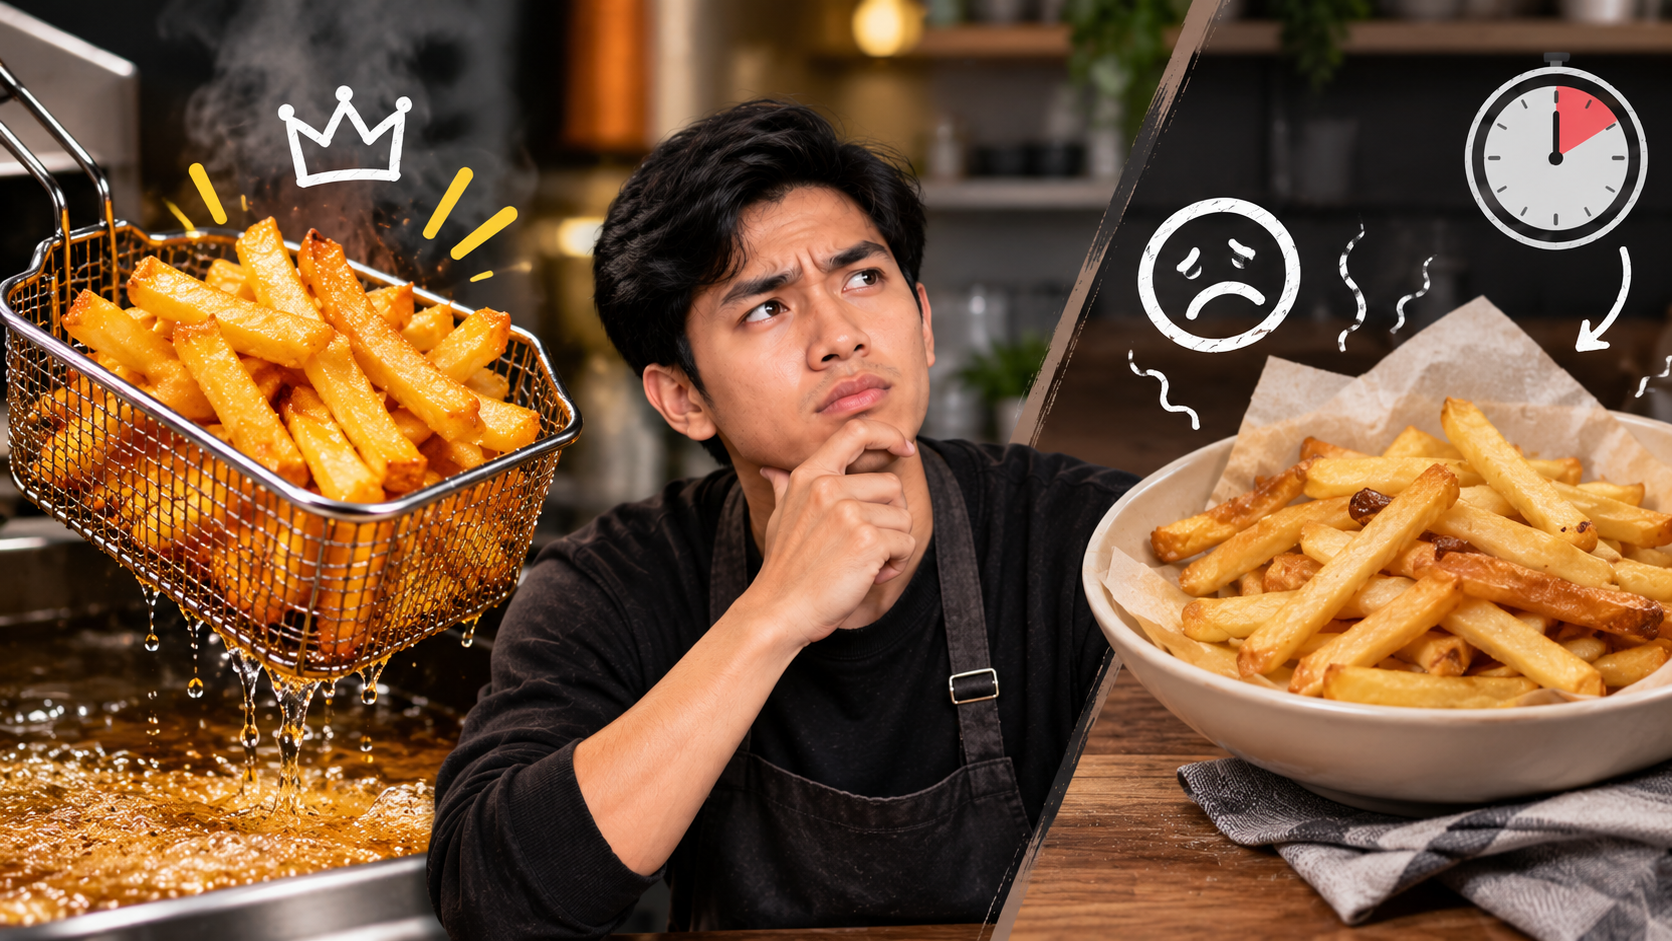
The Fries Look Perfect Straight From the Oil, So Why Are They Soft Five Minutes Later?

You pull the first batch from the oil and everything looks right.

The fries are golden.

The edges seem crisp.

They make that satisfying dry sound when they hit the tray.

You season them immediately, steal one before dinner, and think you finally figured it out.

Then five minutes pass.

The crisp shell begins to disappear.

By the time everyone sits down, the fries are noticeably softer. Put them beside a juicy burger, steak, or a steaming pot of mussels and they soften even faster.

So you blame the potato.

Or the oil.

Or assume restaurant fryers simply have some advantage that cannot be recreated at home.

But crispy Belgian fries are less about finding one magical ingredient and more about controlling moisture, temperature, timing, and the way the potato is cooked from the inside out.

That is why frying the same potato twice can produce a dramatically different result from simply leaving it in hot oil until it turns brown.

Crispy Belgian Fries Start Before the Oil Gets Hot

The final fry gets most of the attention because that is when the potatoes become golden.

But the texture is being determined much earlier.

A good fry needs two things that seem contradictory:

A fluffy, cooked interior.

A dry, crisp exterior.

Trying to create both at exactly the same temperature is difficult.

If the oil is extremely hot from the beginning, the outside may brown before the center is properly cooked.

If the temperature is too low for the entire process, the potato can cook through but struggle to develop the crisp exterior you want.

The classic two-stage approach separates those jobs.

The first fry cooks.

The second fry crisps.

Understanding that distinction makes the entire process easier.

Potato Choice Actually Matters

Not every potato behaves identically in a fryer.

Some contain more moisture.

Some are waxier.

Some have a higher starch content and develop a fluffier interior.

For fries, a relatively starchy potato is usually easier to work with because you want the inside to become tender rather than remain firm and waxy.

The exact varieties available depend on where you live, so chasing one specific Belgian potato variety is not always practical.

Instead, look for potatoes commonly recommended locally for frying, roasting, or baking.

The goal is a potato capable of developing a dry, fluffy center.

Cut Size Changes Everything

Imagine frying two pieces of potato.

One is a thin matchstick.

The other is a thick baton.

They cannot reasonably require exactly the same treatment.

Thin fries cook quickly and have a high proportion of crispy surface.

Thicker Belgian-style fries need enough time for heat to reach the center before the exterior becomes too dark.

Consistency matters too.

If half the batch is thick and the other half thin, some pieces will be perfect while others are either undercooked or over-browned.

You do not need laboratory precision.

Just try to keep the cuts reasonably uniform.

Rinsing Removes Surface Starch

Freshly cut potatoes release starch onto their surfaces.

A rinse in cold water helps remove some of that loose starch.

You will often see the water become cloudy at first.

Continue rinsing until much of that cloudiness has disappeared.

Some cooks also soak the potatoes before frying.

The exact method can vary, but the important point comes afterward:

The potatoes must be dried thoroughly.

Wet Potatoes and Hot Oil Are a Bad Combination

This is not merely about crispness.

It is also about safety.

Water and hot frying oil do not mix peacefully.

Potatoes should be drained and dried thoroughly before they approach the fryer.

Use clean kitchen towels or paper towels and remove as much surface moisture as practical.

Drying also helps the surface move toward the texture you actually want.

If the potato enters the oil carrying unnecessary water, that moisture has to escape before the exterior can become properly crisp.

Why Fry the Potatoes Twice?

This is the heart of crispy Belgian fries.

Instead of asking one frying stage to accomplish everything, divide the process.

During the first fry, the potato cooks through at a lower temperature without developing much color.

The fries should emerge pale and relatively soft.

That can look wrong if you are accustomed to judging fries entirely by color.

But the first fry is preparation.

After resting, the potatoes return to hotter oil.

Now the exterior can brown and crisp quickly because the interior has already been cooked.

That second fry is the finishing stage.

The First Fry Should Not Look Finished

One of the easiest mistakes is waiting for the potatoes to become beautifully golden during the first fry.

If they already look ready to serve, you have pushed the first stage too far.

Think of the first fry as blanching the potato in oil.

You are building the interior.

The potato should become tender without developing the final deep-golden crust.

Depending on fry thickness and equipment, exact cooking time will vary.

Use the recipe’s temperature guidance, but also look at the potato itself.

Temperature Matters More Than Guessing

A saucepan of oil does not tell you its temperature by appearance very accurately.

You can throw in a potato and watch the bubbles, but that still involves guesswork.

A kitchen thermometer makes frying much more repeatable.

Traditional double-fry methods generally use a lower temperature for the first stage and a substantially hotter temperature for the finishing fry.

The exact numbers vary between recipes, equipment, potato varieties, and desired result.

The principle stays consistent:

Cook first.

Crisp second.

Give the Fries Time to Rest Between Frying

The pause between stages is useful.

After the first fry, remove the potatoes and spread them out.

Do not immediately pile them into a deep bowl where they trap steam against one another.

As they rest, surface moisture can continue escaping.

Some recipes use a relatively short cooling period, while others cool the fries much longer before finishing them.

Either way, treating the rest as a real stage rather than an inconvenience helps separate the first fry from the second.

Do Not Crowd the Fryer

You have a large bowl of potatoes.

The temptation is obvious:

Put everything into the oil at once.

Dinner arrives faster.

Except it often does not.

A large amount of relatively cool potato can drop the oil temperature quickly.

Instead of maintaining the heat needed for frying, the oil spends time recovering.

The potatoes also have less room to move.

The result can be pale, greasy, uneven fries.

Work in batches.

Yes, it takes longer.

But temperature control becomes much easier.

Let the Oil Recover Between Batches

Even when you fry smaller batches, the oil temperature will usually drop after potatoes are added.

Do not automatically throw the next batch in the moment the previous one comes out.

Check the temperature.

Let the oil recover.

Then continue.

This simple habit can explain why the first batch sometimes turns out excellent while the final batch seems strangely oily or pale.

The problem may not be the potatoes.

The fryer simply never returned to the intended temperature.

Hotter Is Not Always Better

If high heat creates crispness, why not use maximum heat?

Because you still need control.

Oil that is excessively hot can brown the exterior too quickly.

You can end up with dark fries before the texture inside is where you want it.

There is also a practical safety issue whenever working with hot oil.

Use a suitable deep pot or fryer, keep the setup stable, avoid filling the vessel too high, and never leave hot oil unattended.

Controlled heat beats maximum heat.

The Second Fry Should Be Fast and Focused

The potato has already been cooked.

Now you want color and crunch.

That means the second fry can happen at a higher temperature and typically requires much less time than the first.

Watch the fries.

They should transition toward an even golden exterior.

You are not trying to recook the center from raw.

You are finishing the shell.

Once they reach the texture and color you want, get them out.

Drain Them Without Trapping Steam

You successfully create crisp fries.

Then immediately pile them into a closed container.

Now steam rises from hundreds of hot potato surfaces and has nowhere to escape.

That moisture settles back onto the fries.

Crunch disappears.

This is why post-frying handling matters.

A wire rack is useful because air can circulate around the potatoes.

Paper can also absorb surface oil, but avoid trapping the fries under layers where steam accumulates.

Crisp food needs somewhere for moisture to go.

Salt Them While They Are Hot

Seasoning immediately after frying helps salt adhere to the surface.

But this does not mean drowning the fries in seasoning.

Start reasonably.

Taste.

Adjust.

Good potatoes have flavor of their own, and the fries may also be served with a salty sauce or main dish.

The goal is seasoning, not covering up the potato.

Do Not Make the Fries Wait for Dinner

This is one of the biggest practical differences between restaurant and home cooking.

At home, people often make the fries first.

Then start cooking the steak.

Then prepare the sauce.

Then steam the mussels.

Ten or fifteen minutes later, the fries finally reach the table.

By then, they have been sitting around absorbing moisture from the air and losing heat.

Instead, plan backward from serving time.

The second fry should be one of the final cooking steps.

Moules-Frites Is Really a Timing Exercise

Moules-frites is a perfect example.

The mussels themselves cook quickly.

The fries need two stages.

If you begin both components at the same moment without a plan, one will probably wait for the other.

A better approach is to complete the first fry earlier.

Prepare the aromatics and mussels.

Get everything ready for service.

Then coordinate the second fry with the few minutes needed to steam the mussels.

The goal is simple:

Hot mussels and hot fries should reach the table together.

Do Not Let the Mussel Broth Soak the Fries Too Early

That aromatic broth at the bottom of the mussel pot is delicious.

But it is also liquid.

If you pour it over a pile of fries and then leave the plate sitting, crispness will disappear quickly.

Serve the fries separately.

Dip them as you eat if you like.

Now you get both experiences:

Crunch first.

Rich broth second.

This is far more satisfying than turning the entire portion soft before the first bite.

Why Restaurant Fries Often Stay Crispier

Restaurants have several advantages.

Powerful fryers recover temperature quickly.

Potatoes may be prepared in advance.

Batch sizes are controlled.

Service timing is coordinated.

Most importantly, fries usually move from fryer to plate very quickly.

At home, the biggest improvement may not require better equipment.

It may simply require better sequencing.

Prepare everything else before the second fry.

Then serve immediately.

Oil Choice Should Be Practical

Belgian fry traditions are sometimes associated with animal fats, while many home recipes use neutral frying oils.

For everyday home cooking, choose a fat or oil appropriate for high-temperature frying and follow its handling guidance.

More important than obsessing over a single “authentic” fat is keeping the frying process controlled.

The wrong temperature will ruin expensive ingredients just as easily as inexpensive ones.

Technique still matters.

Used Oil Needs Attention

Frying oil does not remain identical forever.

Food particles accumulate.

Flavor changes.

Repeated heating changes its condition.

If you reuse frying oil, strain out debris and store it appropriately.

If the oil smells unpleasant, appears heavily degraded, smokes unusually early, or has otherwise deteriorated, replace it.

Fresh-tasting fries require oil that is still suitable for frying.

Why Fries Sometimes Taste Greasy

People often assume greasy fries mean too much oil was used.

But the potatoes are being submerged in oil either way.

A more useful question is whether the frying conditions were correct.

Oil that drops too far in temperature can produce disappointing results.

Overcrowding contributes to that.

So does adding a large quantity of cold potato at once.

Control batch size and allow the fryer to recover.

Greasy fries are often a process problem rather than a simple “too much oil” problem.

Pale Fries Can Still Be Cooked

Color is not the only indicator of doneness during the first fry.

Remember that you are intentionally trying to avoid deep browning at this stage.

A pale fry can already have a cooked, tender center.

Test one.

Let it cool enough to handle safely and examine the inside.

If the center is still distinctly raw and firm, it needs more cooking.

If it is tender, the first stage has done its job.

Dark Fries Are Not Automatically Crisp

This surprises beginners.

A fry can become dark without developing the ideal texture.

Color tells you browning happened.

It does not tell you that the entire process was correct.

If the potato started too wet, oil temperature was poorly controlled, or the fry sat steaming after cooking, it can still disappoint despite looking beautifully brown.

Judge texture as well as appearance.

The Interior Matters as Much as the Crunch

Great fries are not simply crunchy potato sticks.

The contrast matters.

Crisp outside.

Tender, fluffy potato inside.

If you chase maximum crunch without considering the center, you can produce something hard and dry.

That is another reason the two-stage process works so well.

Each stage has a different job.

The first protects the interior experience.

The second creates the exterior experience.

Homemade Fries Do Not Need to Look Identical

Restaurant fries often look extremely uniform.

At home, a little variation is fine.

One fry may be slightly darker.

Another slightly shorter.

What matters more is that the cuts are similar enough to cook at roughly the same rate.

Do not spend half an hour measuring every potato baton with a ruler.

Consistency helps.

Perfection is unnecessary.

Prepare the Potatoes Before Guests Arrive

If you are serving a group, do not wait until everyone is hungry before starting the entire process.

Cut and prepare the potatoes earlier.

Complete the first frying stage according to your chosen recipe.

Then organize the rest of the meal.

When it is almost time to eat, the second fry becomes fast.

This transforms fries from a stressful last-minute project into a manageable service step.

A Wire Rack Is More Useful Than It Looks

A wire rack is usually associated with cooling cakes and cookies.

It is also extremely useful for fried food.

Place a tray underneath to catch oil.

The fries sit above the surface instead of lying in a puddle.

Air circulates.

Steam escapes more easily.

This simple setup can improve the few crucial minutes between fryer and table.

Keep Sauces on the Side

Mayonnaise and other dipping sauces are part of the pleasure of fries.

But sauce is another source of moisture.

If you coat the fries too early, crispness disappears.

Serve dips separately.

Each bite gets sauce when you actually eat it.

The same principle applies when fries accompany stews, gravies, or other saucy foods.

Keep them separate until you want the textures to meet.

Reheating Leftover Fries Requires Dry Heat

Cold leftover fries rarely return to their original texture simply by sitting at room temperature.

And reheating them in a way that traps moisture can make them even softer.

Dry, relatively intense heat is generally more useful for restoring some crispness.

An oven or air fryer can work better than methods that encourage steaming.

They may not become exactly like freshly fried potatoes, but the texture can improve considerably.

The Air Fryer Produces a Different Experience

An air fryer can make very enjoyable potatoes with much less frying oil.

But it is worth separating two goals.

Do you want tasty, crisp potato fries?

Or are you specifically trying to reproduce traditional deep-fried Belgian-style fries?

Those are not necessarily identical projects.

Use the appliance you prefer, but judge the result based on what that method is designed to do rather than expecting every cooking technique to produce exactly the same texture.

Frozen Fries Are Not Automatically Inferior

Good frozen fries can perform surprisingly well because much of the preparation has already been standardized.

They are convenient.

Consistent.

Easy to portion.

Making fries from fresh potatoes gives you more control over potato variety, cut, first fry, and final texture.

Neither option needs to become a culinary morality test.

If the goal is learning technique, fresh potatoes teach more.

If the goal is getting dinner on the table quickly, convenience has value.

Small Details Become Important Because Fries Are Simple

Potatoes.

Fat.

Salt.

That basic formula leaves nowhere for mistakes to hide.

A complicated dish can sometimes absorb small inconsistencies.

Fries cannot.

Wrong potato texture?

You notice.

Oil too cool?

You notice.

Potatoes wet?

You notice.

Served ten minutes late?

You definitely notice.

The simplicity of fries is exactly what makes technique so important.

Build Your Own Repeatable Frying Routine

Instead of chasing a different internet trick every weekend, create one method you can repeat.

Use the same type of potato when possible.

Cut to a similar thickness.

Rinse consistently.

Dry thoroughly.

Use measured oil temperatures.

Keep batch size similar.

Record how long each stage takes in your equipment.

After a few attempts, you will understand your kitchen far better than if you constantly change every variable.

Troubleshoot the Texture, Not Just the Recipe

If your fries are soft, ask when they became soft.

Were they never crisp?

Check frying temperature, moisture, and batch size.

Were they crisp from the oil but soft five minutes later?

Look at draining, steam, holding time, and serving method.

Are they dark outside but firm inside?

The first cooking stage may need attention.

Are they crisp but hollow and overly dry?

The process may be too aggressive.

Identifying when the problem appears makes troubleshooting much faster.

Good Fries Are a Service Problem as Much as a Cooking Problem

This is the lesson that gets overlooked.

You can execute the frying perfectly and still serve mediocre fries if they wait too long.

So think beyond the fryer.

Where will they drain?

When will they be salted?

Is the rest of dinner ready?

Are the plates ready?

Are sauces already on the table?

Can everyone eat immediately?

The last five minutes deserve as much planning as the first twenty.

Conclusion

The secret to crispy Belgian fries is not simply frying potatoes until they look golden.

Great texture comes from controlling the entire process.

Choose a suitable potato.

Cut it consistently.

Rinse away loose surface starch.

Dry the pieces thoroughly.

Use the first fry to cook the interior, let the potatoes rest, then use a hotter second fry to build the crisp exterior.

Avoid overcrowding the fryer and allow the oil temperature to recover between batches.

Once the fries come out, do not trap them under steam or make them wait while the rest of dinner is still cooking.

Drain them well, season while hot, and serve as quickly as possible.

That final point becomes especially important with dishes such as moules-frites.

The mussels can be juicy.

The broth can be rich.

The mayonnaise can be creamy.

But the fries should arrive with their crunch intact.

Because when a fry is crisp outside, fluffy inside, properly salted, and still hot enough that you have to hesitate before taking the first bite, potatoes stop feeling like a side dish.

They become half the reason you made dinner in the first place.